Stratocaster Wiring – Tips, Mods & More!
It’s no secret that the Fender Stratocaster® is one of the most popular guitar models of all time. Because of this, we sell a lot of Strat pickups. Our most popular Strat models are our Clean & Clear Vintage Hot and our Thick & Dirty Blues Specials – they simply sound like a Strat should.
Today, we’ve got some useful Stratocaster wiring tips and mods to share. We wanted to go through a few variations of the Stratocaster wiring, as well as some mods you can make to your Strat to super-charge it.
For the sake of brevity, we are only going to be focusing on Fender Strats with three Single Coil pickups, or, ‘SSS’ Strats, but this wiring also can apply to HSS strats as well!
Standard Stratocaster Wiring:
To start, we’re going to discuss the standard Stratocaster wiring that comes on most modern Fender Strats:
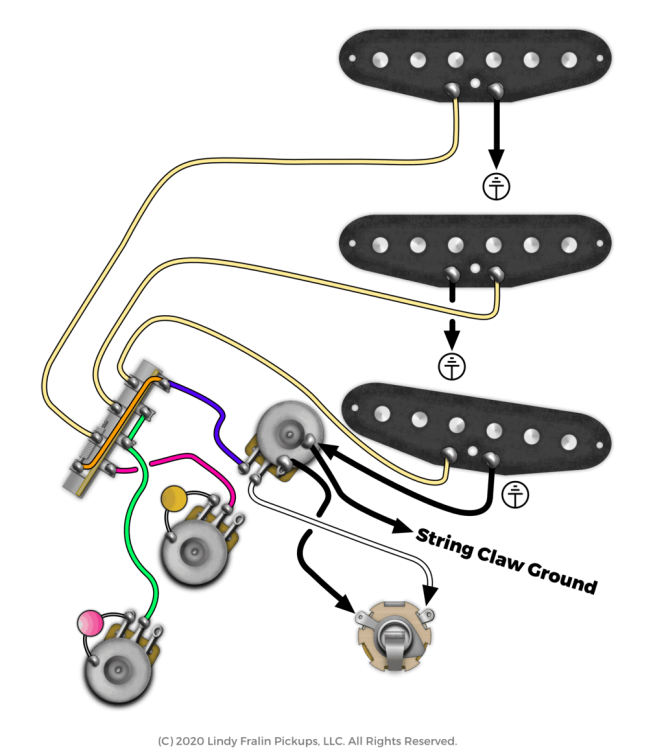
This Standard Stratocaster Wiring Diagram features a Neck tone (0.02mfd) and a Bridge & Middle tone (0.02mfd). You can always experiment with different cap values for a different sound, but this wiring is what comes standard on most Fender Strats after 2000.
This wiring is great for Strat players who want a simple and easy operation.
Variation On Standard Wiring:
If you wanted a different tone layout, you could simply reverse the way the 5-Way Switch wiring to get a Neck & Middle Tone and a separate Bridge Tone:
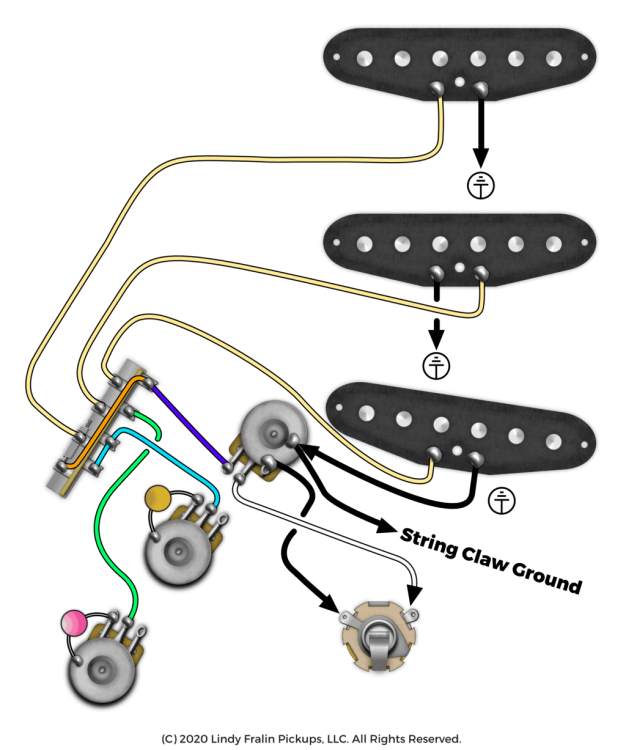
This variation allows you to keep the standard functionality of a Fender Strat while experimenting with different tone values for your Bridge Tone.
Lindy loves to have a Magic Cap (0.0015mfd) on his Bridge. This cap doesn’t act like a normal tone cap. Instead, it makes a Fender Bridge sound more like a Humbucker.
Modified Fender Strat Wiring:
At Fralin Pickups, nobody loves tinkering with wiring options more than Lindy himself. Over the past 30 years, he’s developed quite a few mods that take the Strat to the next level, without getting too technical and crazy.
Blender Pot Wiring:
For those in the know, the Blender Pot is one of the most potent mods you can make to your Strat. At under $15 and a super-easy installation, you can take your standard 5-Sound Strat into new sonic territory. For those who want to tinker, even more, our Half-Blender wiring is another great option too.
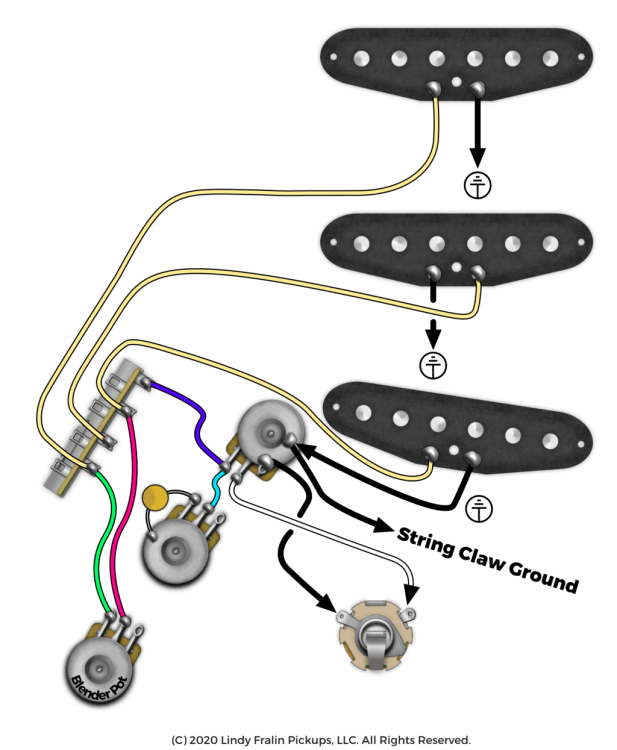
With the Blender Pot modification, you sacrifice having two independent Tone Pots, and opt for a Master Tone instead.
In our previous article, we discussed the Half Bender Modification. This modification uses the same Blender Pot, but wires it a bit differently:
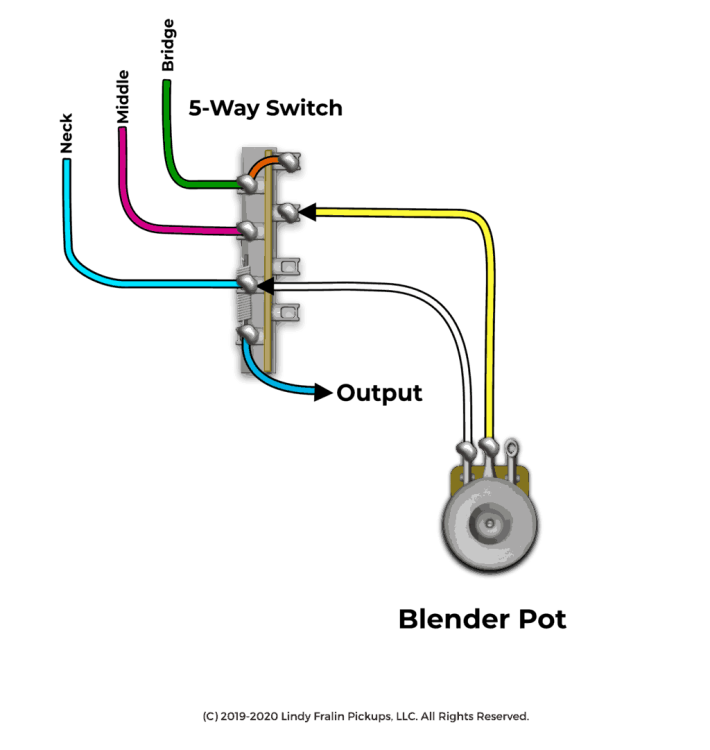
Unlike the Standard mod, the Half Blender only works in Positions 1 & 2 of the switch: the Bridge, and Bridge + Middle Positions.
How is this useful? Well, for one, you can have a ‘Telecaster’ type tone in Position 1, then with one flip of the 5-Way switch, full Strat Neck tone: no knob-turning required!
Variation of Blender Pot Strat:
If you love your Blender Pot but miss having two tones, you can opt for a 2 Tone Cap Modification.The 2 Tone Cap Mod is a Push-Pull mod that allows you to achieve one tone cap in the ‘down position,’ and another tone cap in the ‘up position.’
Check it out here:
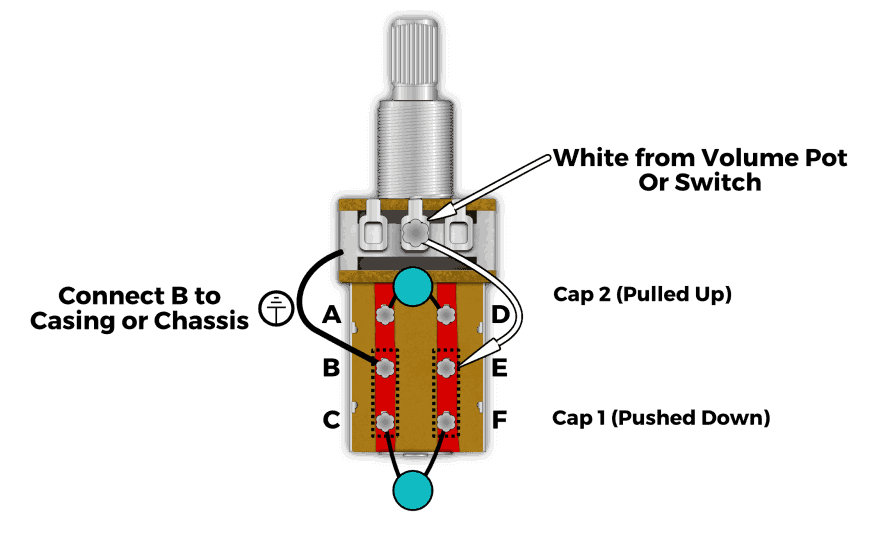
To wire this up, follow the above Blender Pot wiring diagram and replace the Master Tone with this Push-Pull Pot Modification. If you’re looking for more Push-Pull pot mods, check out our article below:
Baseplate:
The Lindy Fralin Baseplate is a Steel Plate that installs beneath your Bridge pickup. It’s designed to provide a more powerful Bridge pickup tone by making the pickup slightly more efficient.
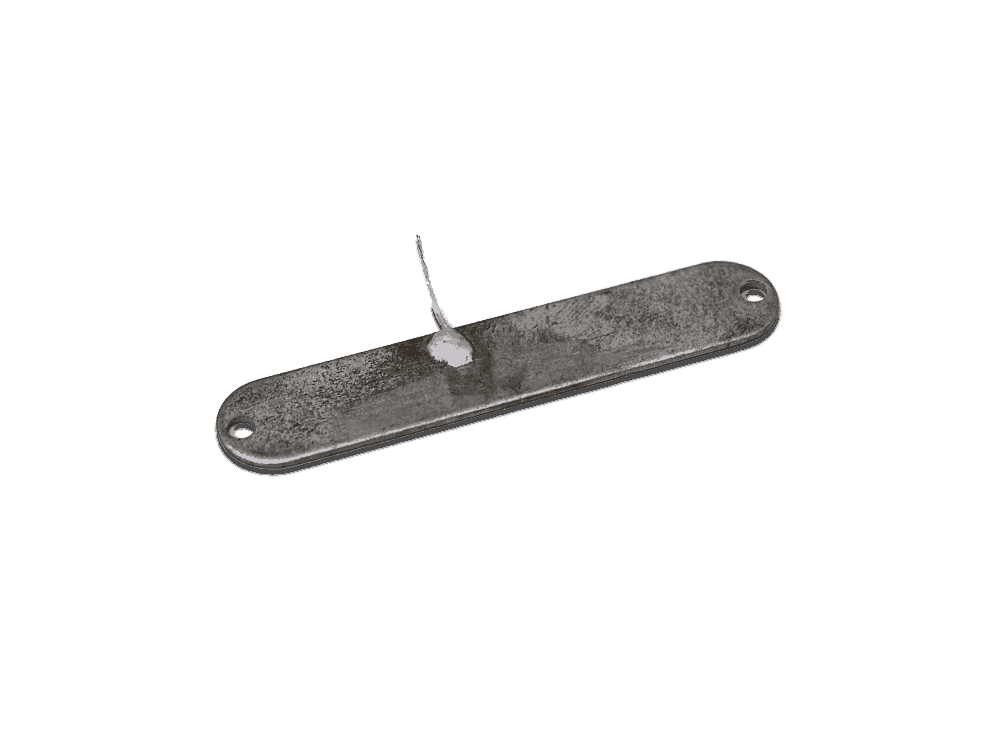
For $12, this is a great mod for those who want a slightly thicker and more powerful Bridge tone, without having to rewind the pickup to hotter specifications.
Tips & Tricks:
We’ve wired hundreds of Strat Pickguards due to the popularity of our Prewired Pickguards (they have been our best-selling product since 2019). Because of this, we’ve got a few tips and tricks up our sleeve to make installation a breeze:
Tip #1: Control Your Wires
If you’ve ever wired a Strat yourself, you might understand the frustration of getting all wires to sit neatly in your control cavity. Due to the routing of the Stratocaster Body, you might only have a narrow channel to lay your wires.
The best way to make sure your wires stay nice and neat is to use some Masking Tape or Shrink Tubing on your pickup wires like so:
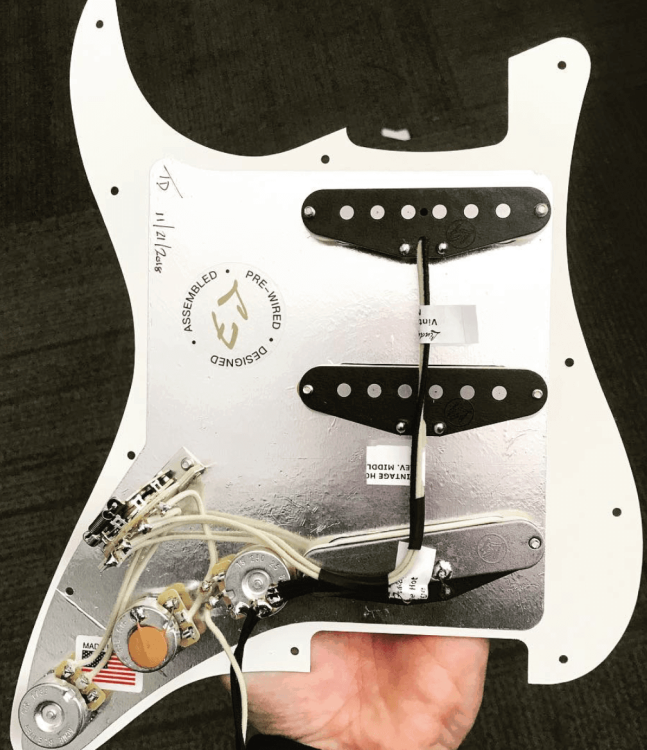
Tip #2: Don’t Over-ground
Take a look at the following image of a Strat – notice how each part connects to ground once. Notice any jumpers? The Shielding on the back of the pickguard is connecting everything. If you were to add jumpers between parts, you’d be creating a “Ground Loop” and introducing noise into your circuit.
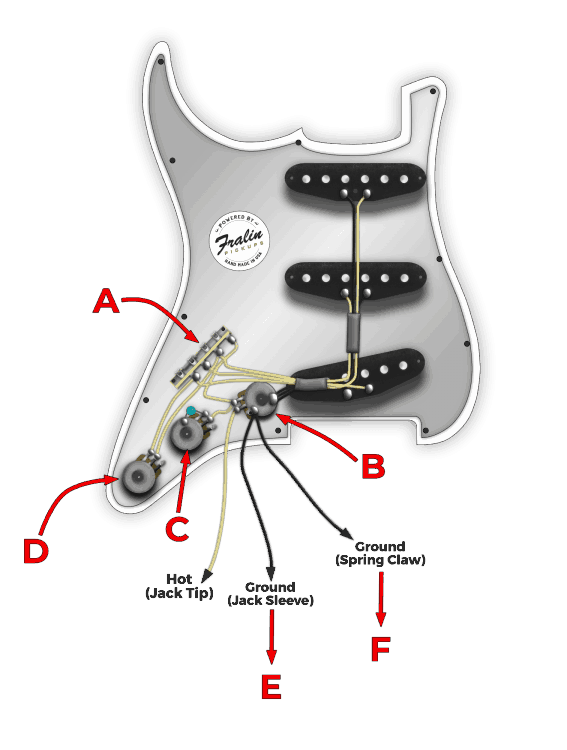
Notice the A-F points. These mark the locations of parts that need grounding. You don’t see any jumpers between the parts because it’s the shielding that connects them all.
What you do see, however, is a common ground point (Volume Pot) where all grounds lead. This is called Star Grounding, and is the best practice for grounding your Strat.
That about does it for Stratocaster Wiring Tips & Tricks! I hope you found this article helpful, and as always, let us know what you think below!


